WELCOME. The Contents below will help you navigate your
way through the world of HTML.
Learn as much as you can about HTML.
Show off your creative talents at the end of this tutorial when you will
create your own web page using HTML.
Any text you find underlined means it is linked and will transport you
to: more information or around this site.
Also, some of the pictures are linked.
If you get lost, use the “Captain’s Log Book” as your guide.
‘Bon
Voyage.’
Contents
|
|
Basic Rules
Myth: HTML is not
a computer language.
Fact: It is a code. The basics of
which are:
|
Spacing |
Avoid spacing in HTML code. This
can cause problems. More importantly,
check your spellings!!! |
|
Angle Brackets |
Use angle
brackets like these < > to tell
the Web browser that it is
dealing with HTML code and not simply text. |
|
Tags |
Tags are the
words or abbreviations you will place in between the brackets to tell your
page how you want the text to look.
The example below will tell the page that things will be done in HTML. <HTML> Type the command in between the
brackets. This style of brackets and tagging is always used tell your
software what you want to do. </HTML> The forward slash is placed before the
command. This tells the software,
that you want to stop. In this case, you want to stop using HTML. |
The HTML Skeleton
When creating
your web page - Remember HTML, (like you), has two main parts:
|
1. Head <Head>
</Head> |
This will
contain the Title. It places the
title right on the very HEAD of your page.
You won’t see it in the page area.
It is not the title for your text.
That is done later in the Body. |
|
2. Body <Body>
</Body> |
This will
contain the text and pictures in the page. |
FIRST
STEPS IN HTML:
- The page must be told it is
using HTML.
- At the end of everything you do, you must tell it that you
have finished. Remember the rule for how to end each instruction.
- Then you must give your HTML
page a HEAD. Within the HEAD you
must have a TITLE.
- Then you must give it a BODY
and when you have finished working in the Body – end it.
Read points 1-4 carefully and then click on the
arrangement below, which you think is correct.
|
<HTML> </HTML> <Head> <Body> <Title> </Head> <Body/> /<Title> |
<HTML> <Head> <Title> </Title> </Head> <Body> </Body> </HTML> |
Congratulations. You’re getting good at this. Write this code down. You must remember the way this HTML skeleton
is built, because all the new HTML codes you learn from now on will be put
within this skeleton.
Title & Text: Playing with Text
Now, add
some flesh to our skeleton. Read
through the instructions in the table below:
|
Between start
title and end title command in your skeleton, type in the title of your web
page. Once
you’ve done this, forget about the head and concentrate on the body. |
The text should go here |
||
|
The
body: will contain all the
information you want to include. Make
sure you know who you are talking to - Identify your AUDIENCE. Click
here for more information. |
<body>……………………..</body> |
||
|
PARAGRAPHS: simply use the letter ‘P’
as a tag. A paragraph starts – within
the body- and you can have as many as you like. Keep them on separate lines as it makes it easier for you to
see and REMEMBER to end each one before you start the next. |
<p>…………………………………..</p> |

Playing With Text 1.
Again, read
the instructions for new HTML code below and try and remember as much as you
can. You will be quizzed on it.
|
Text
Headings: <H> Your page and some of your paragraphs may
need headings. In HTML there are 6
different sizes of heading. <H1> is the largest and <H6> is the
smallest. All you need do is decide on
what your heading will be and what size you want it. Remember to close the code when you’ve
finished!!!! |
<H1>…………………………….</H1> <H2>……………………………</H2> <H3>……………………………..</H3> <H4>……………………………...</H4> <H5>………………………………</H5> <H6>………………………………</H6> |
|
Font
size: <Font size=> Like with the headings above the font size of your text can be
changed. This time you have 7 sizes.
Unlike with the Headings, Font is not abbreviated and it carries with it the
word ‘size’ and an = sign. <Font
size=7> is the largest, where <Font size=1> is the smallest. With
Headings it is the opposite way round.
Note that the ending is slightly different. The word ‘size’ and the = have been dropped. It is simply </font> |
<Font
size=1>….…………</Font> <Font
size=2>….…………</Font> <Font
size=3>….…………</Font> <Font
size=4>….…………</Font> <Font
size=5>….…………</Font> <Font
size=6>….…………</Font> <Font
size=7>….…………</Font> |
|
Bold, Italic, Underline:
in HTML are nice and simple. They are
all abbreviated to the first letter. |
<B>………………………………</B> <I>………………………………..</I> <U>……………………………….</U> |
|
Font
typeface: The HTML instruction looks like
this <Font face=”typeface”.
Typeface means the name of the font you want to use. For example Arial
or Times New Roman. You only need to
use this command if you want to change the font. The software you’ll be using to design your own HTML page will automatically
use a font type, so unless you want to change it, you wont have to worry too
much about this HTML instruction. |
<Font face=”typeface”>……………………… ……………………</Font face=”typeface”> If you do
decide to change your font. Do not be too ambitious. You have to think about what type of
computer your audience
has. Not everyone will have all the
fancy font types. Stick to the most
common ones: Arial, Helvetica, or Times New Roman. |
Right,
that’s enough for now. Let’s have a
little quiz on it. Make sure you read
through all the code rules above and then click on the anchor to take you to
the quiz.

Playing With Text 2
HTML has some
useful codes for colour, both for font and for page background. Please see the table below for more
details. HTML has a list of the most
user-friendly colours. In other words
colours that everyone’s p.c. can show – see the colour palette below:
|
Font
Colour: =”name of colour”. If you don’t specify a colour your font
will default to black. Useful
tip: change your
font colour only after you have typed in all the text on your page and
decided on it’s size. This means you won’t have to open new brackets you can just
stick the colour in where you already have HTML instructions for the
font. See example: in right hand
column |
Insert
colour here! This becomes: <font size=3
colour=”red”>…………..</font> |
|||||
Page Colour: Bgcolour=”name of colour”
If you don’t specify a colour, the page will default to white. Like with font colour, this will go inside a tag that you have already done. Because you want to change the colour of the whole page, you will have to put the colour in the body: <body> tag |
Insert
colour here! This
becomes: <body
Bgcolour=”yellow”>………..</body> |
|||||
|
Colour Palette: Aqua, Black, Blue, Fuchsia, Green, Grey, Lime, Maroon, Navy, Olive, Purple, Red, Silver, White, Yellow |
|
|||||


Marquees
|
Marquee:
On the right hand side is the basic HTML code for setting up a marquee
to move your text across the page. |
Example:
|
|||
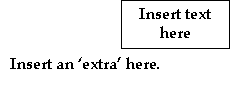
Extras:
If you put these in where the example above on the right hand side
says you should, you can play with the movement of your text. It will do what you tell it to do. Align=Top
or Bottom Behaviour=Slide
or Scroll Direction=Left
or Right |
Example: <Marquee
Align=Top Behaviour=slide Direction=right>………..</Marquee> |
You can
either finish now by clicking the exit button or you can have a little quiz on
what you’ve just learnt by clicking on the anchor.


The End
You have reached the end of the Tutorial. Leave the tutorial open. Now open
MS Notepad to
start building your own HTML page. Use
this tutorial and the handbook as a reference.